You just bought your first smart speaker, a few bulbs, and maybe a plug. Then you open the boxes and stare at the cables, apps, and tiny screws. It’s easy to feel lost when you see terms like “hub,” “Z-Wave,” or “bridge.” You want the convenience of a connected home, but you don’t want to pay an installer hundreds of dollars. That’s exactly why this DIY smart home installation guide for beginners step by step exists. I’ll walk you through the entire process, from choosing the right gear to getting everything online, without the confusion or hidden costs.
Today’s smart home market is more beginner-friendly than ever. Devices are cheaper, apps are cleaner, and most work right out of the box. Still, a few wrong moves can leave you with a gadget that won’t play nice with others. Whether you’re securing your front door or controlling your living room lights, a clear plan makes all the difference. Let’s turn that pile of boxes into a home that actually listens to you.
Why Go DIY? The Real Benefits of Installing Your Own Smart Home
Doing it yourself saves money, but that’s only the start. You also learn how each device works, so when something glitches (and it will), you can fix it quickly instead of waiting for a technician. Plus, you get to choose the exact products that fit your lifestyle and budget.
Table of Contents
- Why Go DIY? The Real Benefits of Installing Your Own Smart Home
- What You Need to Get Started: Tools and Basics
- Step‑by‑Step Installation Guide: From Unboxing to Automation
- 1. Start with the Hub (If You Need One)
- 2. Set Up Your Voice Assistant
- 3. Install Smart Bulbs and Plugs (Easiest First)
- 4. Tackle Switches and Dimmers (Requires Wiring)
- 5. Install Smart Locks and Security Devices
- 6. Add Motion Sensors and Cameras
- 7. Create Automations
- Comparison Table: Best Smart Home Hubs for Beginners
- Top Products for Your DIY Smart Home (Numbered List)
- 1. Smart Lighting Starter Kit
- 2. Smart Plug for Everyday Appliances
- 3. Smart Thermostat for Multi‑Zone Heating
- 4. Smart Door Lock with Fingerprint and Keypad
- 5. Smart Garage Door Opener with Built‑In Camera
- Detailed Guide: What to Look for When Choosing Smart Home Devices
- Compatibility and Ecosystem
- Ease of Setup
- Pricing and Hidden Costs
- Security and Privacy
- Future‑Proofing
- Frequently Asked Questions
- Q1: Do I need a hub for my smart home?
- Q2: Will smart home devices work with my old wiring?
- Q3: Can I install smart home devices if I rent?
- Q4: How do I make sure my Wi‑Fi is strong enough?
- Q5: What is the Matter standard and why should I care?
- Q6: How often do I need to replace batteries in sensors and locks?
- Q7: Can I install everything in one day?
- Q8: Are there any security risks with smart home devices?
- Final Summary: Best Recommendations for Every DIY Smart Home Need
- Conclusion: Your DIY Smart Home Journey Starts Now
Professional installation often locks you into a specific ecosystem or contract. With DIY, you can start small — maybe one smart plug and a voice assistant — then expand at your own pace. That flexibility is priceless, especially if you rent or plan to move.
What You Need to Get Started: Tools and Basics
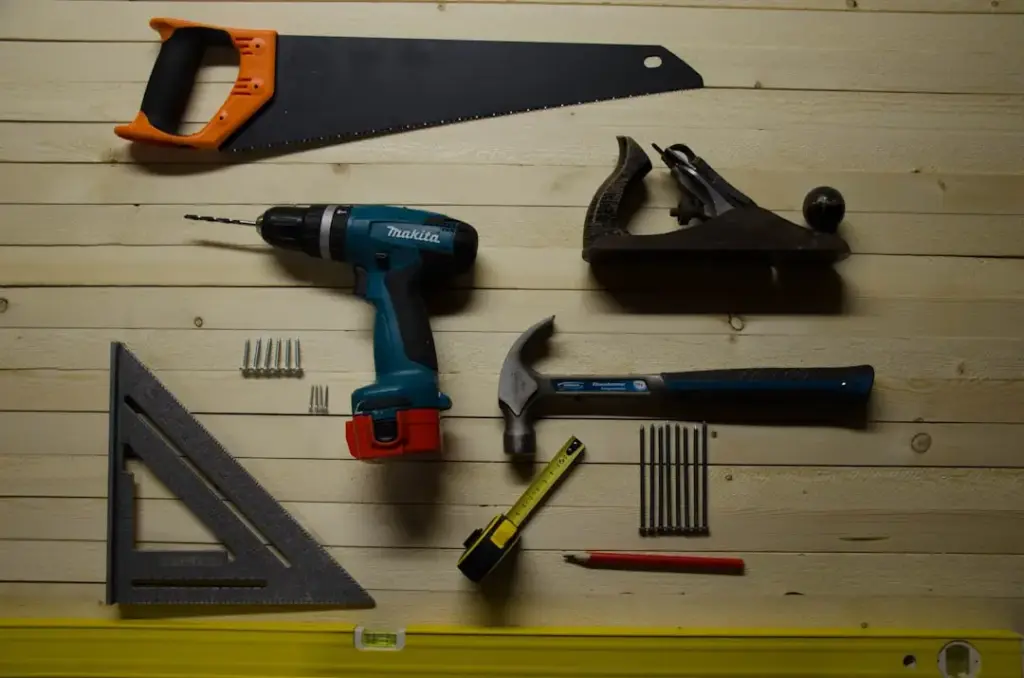
Before you touch a single device, gather a few essentials. You’ll need a smartphone or tablet (iOS or Android), a strong Wi‑Fi network (ideally with a router that supports 2.4 GHz and 5 GHz bands), and a power drill if you plan to mount anything. Most smart home devices also require a stable internet connection of at least 10 Mbps.
- Smartphone with the device’s companion app installed.
- Wi‑Fi password handy for initial setup.
- Small screwdriver set (Phillips and flathead).
- Level (for aligning sensors or cameras).
- Double‑sided tape or adhesive strips (rental‑friendly).
Many beginners overlook the importance of a quality hub. While some devices work directly over Wi‑Fi, others use Zigbee or Z‑Wave and need a hub to communicate. Your choice of hub (or hub‑free system) will affect which devices you can buy later. Plan before you purchase.
Step‑by‑Step Installation Guide: From Unboxing to Automation
1. Start with the Hub (If You Need One)
If your system requires a hub (like Samsung SmartThings or Amazon Echo Plus), plug it in near your router. Connect it to your Wi‑Fi using the app, and let it update firmware. This can take 10–15 minutes, so be patient. A stable hub is the backbone of your smart home.
2. Set Up Your Voice Assistant
Amazon Alexa, Google Assistant, or Apple Siri are the brains behind voice commands. Open the app, follow the prompts to link your account, and test a simple command like “turn on the kitchen light” (even if the light isn’t connected yet). This ensures your voice control is ready for later devices.
3. Install Smart Bulbs and Plugs (Easiest First)
Smart bulbs simply screw into existing sockets. Plugs go into any wall outlet. For each device, download the manufacturer’s app, create an account, and follow the pairing process — usually a light blinks to confirm. Once paired, rename the device something clear like “Living Room Lamp” so you don’t get confused later.
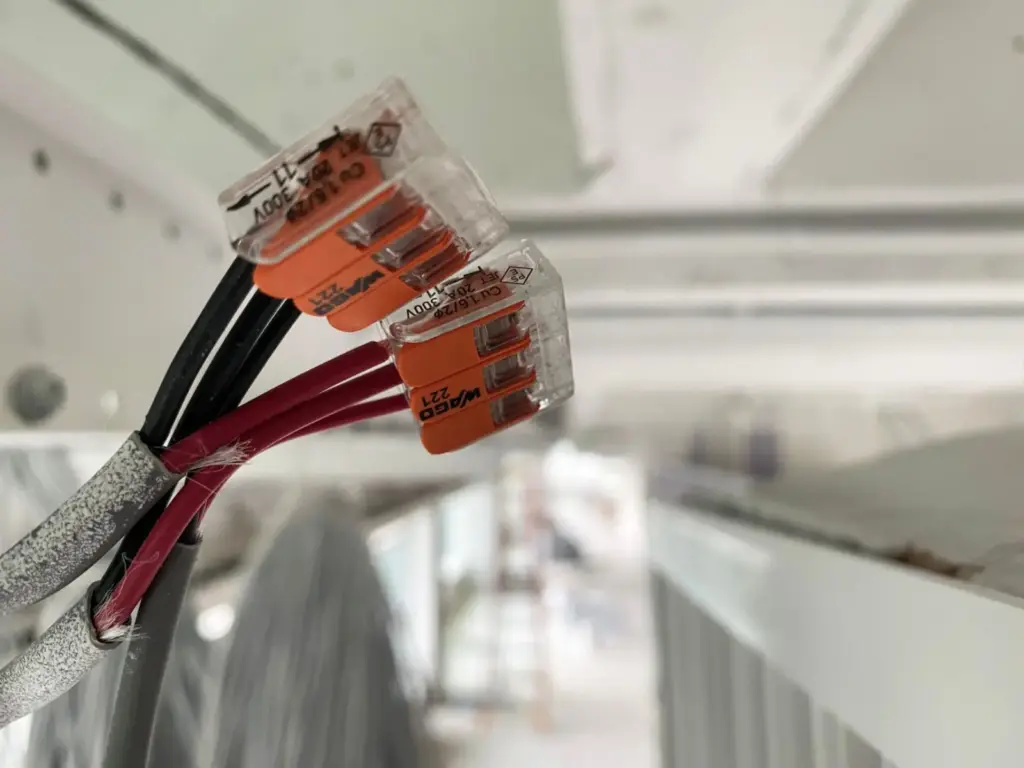
4. Tackle Switches and Dimmers (Requires Wiring)
If you feel comfortable turning off the breaker and matching wires, smart switches are a huge upgrade. Always turn off power at the breaker box, use a voltage tester, and follow the included wiring diagram. Read also: Cost to Install Smart Home Lighting System in 2500 Sq Ft Home: 2026 Guide – this gives you a realistic idea of the investment before you start.
5. Install Smart Locks and Security Devices
Smart locks replace your deadbolt. Most fit standard doors, but you may need a screwdriver and a bit of patience. After installation, calibrate the lock in the app so it knows when the door is fully closed. Read also: Smart Door Lock with Fingerprint and Keypad for Front Door: 2026 Guide – it covers models that combine fingerprint, keypad, and app control for maximum security and convenience.
6. Add Motion Sensors and Cameras
Stick sensors at doorways or windows using the included adhesive. Cameras often need a stable power source and a good Wi‑Fi signal. Mount them at eye level or higher — never point a camera into a neighbour’s property. Test the viewing angle on your phone before finalising the mount.
7. Create Automations
Once all devices are online, it’s time for the real magic. In your hub’s app, set routines like “Good Morning” (turn on lights, adjust thermostat) or “Away” (turn off everything, arm lock). Start with one simple automation, then add complexity as you get comfortable.
Comparison Table: Best Smart Home Hubs for Beginners
Choosing the right hub is the most critical decision for a smooth DIY experience. Below is a quick comparison of the most popular options, based on ease of setup, device compatibility, and price.
| Hub | Ease of Setup | Device Compatibility | Supported Protocols | Price Range | Best For |
|---|---|---|---|---|---|
| Amazon Echo Plus (3rd Gen) | Very easy — built‑in Zigbee hub | 1000s of Alexa‑compatible devices | Wi‑Fi, Zigbee | $99 – $140 | Alexa users who want a simple all‑in‑one hub |
| Google Nest Hub (2nd Gen) | Easy — uses Google Home app | 1000s of Google‑compatible devices | Wi‑Fi, Thread (limited) | $99 – $130 | Google Assistant fans and thread beginners |
| Samsung SmartThings Hub (Station) | Moderate — requires app and account | 300+ (Zigbee, Z‑Wave, Wi‑Fi) | Wi‑Fi, Zigbee, Z‑Wave | $69 – $99 | Users who want broad protocol support and local control |
| Apple HomePod Mini | Easy — integrates via Apple Home app | Only HomeKit‑compatible devices | Wi‑Fi, Thread | $99 | Apple ecosystem users with simple needs |
Top Products for Your DIY Smart Home (Numbered List)
1. Smart Lighting Starter Kit
Overview: A set of smart bulbs or a bridge that lets you control lights from your phone or voice. It’s the best entry point because it’s cheap, requires no wiring, and instantly shows the value of automation.
Features: Dimmable, color‑changing, remote access, scheduling, voice control (Alexa/Google). Most use Zigbee or Wi‑Fi. Some include a hub.
Pricing: $30–$80 for a starter kit of 2–4 bulbs. Individual bulbs start at $10 each (Wi‑Fi) or $15 (Zigbee with hub).
Advantages:
- No wiring needed – screws into existing sockets.
- Instant feedback – you see results right away.
- Affordable and easy to expand.
Disadvantages:
- Bulbs require constant power; switch must remain on.
- Some bulbs dim or flicker with older fixtures.
Best For: Absolute beginners who want a low‑risk, high‑impact first project.
User Experience: Most users report setup in under 15 minutes per bulb. The biggest frustration is remembering to keep the physical light switch in the “on” position after installing a smart bulb.
Expert Opinion: Start with a hub‑based system (like Philips Hue) if you plan to add many lights later. Wi‑Fi bulbs are fine for 1–3 lights, but too many can clog your network. Always check compatibility with your existing dimmer switches.
2. Smart Plug for Everyday Appliances
Overview: A device that plugs into your wall outlet and turns any dumb appliance into a smart one. Great for lamps, coffee makers, fans, or holiday lights.
Features: Remote on/off, energy monitoring, scheduling, timer. Some models include a USB charging port. Outdoor versions have weatherproof covers.
Pricing: $10–$30 per plug. Outdoor weatherproof plugs cost $20–$40.
Advantages:
- No wiring – just plug and pair.
- Works with existing appliances.
- Inexpensive entry point.
Disadvantages:
- Uses one outlet – may block adjacent sockets.
- Some plugs add a slight hum (rare).
Best For: Anyone who wants to automate a few devices without replacing expensive appliances.
User Experience: Setup typically requires scanning a QR code and naming the plug. Users appreciate energy tracking to see how much their space heater really costs. Read also: Best Outdoor Smart Plug with Weatherproof Cover: Top Picks for Rain, Snow, and Sun – if you plan to control outdoor lights or decorations, this is essential reading.
Expert Opinion: Look for plugs that support energy monitoring and a schedule without requiring a subscription. Avoid bargain brands that lack UL certification – fire safety matters even with a small plug.
3. Smart Thermostat for Multi‑Zone Heating
Overview: A thermostat that replaces your wall unit and learns your schedule, adjusting temperatures automatically. Saves on heating and cooling bills.
Features: Wi‑Fi connectivity, geofencing, motion sensors, multi‑zone support, HVAC compatibility check in app.
Pricing: $100–$250. Some energy companies offer rebates of $25–$100.
Advantages:
- Energy savings of 10–15% on average.
- Remote control from anywhere.
- Learning algorithms reduce manual tweaking.
Disadvantages:
- Requires a C‑wire (common wire) for some models – older homes may lack it.
- Not compatible with all HVAC systems (e.g., heat pumps may require special models).
Best For: Homeowners with central heating/cooling who want to save money and energy.
User Experience: Most users love the phone control and auto‑away features. The biggest complaint is the complexity of wiring for those without a C‑wire – but many brands include an adapter. Read also: Best Smart Thermostat for Multi Zone Heating Systems: Expert Guide (2026) – a must‑read if you have separate zones in your home.
Expert Opinion: Check your system’s compatibility before buying. Use the compatibility checker on the brand’s website. Nest and Ecobee are both excellent, but Ecobee includes a room sensor in the box that’s great for uneven heating.
4. Smart Door Lock with Fingerprint and Keypad
Overview: A battery‑powered lock that replaces your deadbolt. Unlock via fingerprint, keypad, smartphone, or voice. No more lost keys.
Features: Fingerprint scanner, backlit keypad, auto‑lock timer, temporary access codes for guests, Wi‑Fi or Bluetooth connectivity.
Pricing: $100–$300. Installation kits often included.
Advantages:
- Keyless entry – no fumbling in the dark.
- Codes for guests, cleaners, or dog walkers.
- Integration with smart home alarms.
Disadvantages:
- Battery drain – you need to change batteries every 3–6 months.
- Some models require a separate hub for remote access.
Best For: Homeowners and renters who want improved convenience and security without changing the door.
User Experience: Setup takes 20–40 minutes with a screwdriver. Users love the fingerprint speed – under 1 second. The main frustration is remembering to close the door fully so the lock engages. Read also: Smart Door Lock with Fingerprint and Keypad for Front Door (2026) – this guide breaks down the best models and installation tips.
Expert Opinion: Choose a lock with a physical key backup in case of dead batteries. Also check if your door’s backset is 2‑3/8” or 2‑3/4” – most locks fit both, but you should measure.
5. Smart Garage Door Opener with Built‑In Camera
Overview: A connected garage door opener or a retrofit kit that turns your existing opener into a smart one. The built‑in camera lets you see if the door is closed and monitors activity.
Features: Remote open/close via app, live video feed, motion alerts, scheduling, voice control. Some include a backup battery.
Pricing: $150–$400 for a full opener with camera. Retrofit kits cost $50–$100.
Advantages:
- Never wonder “did I close the garage?” again.
- Camera acts as a security camera for the garage.
- Works with most existing openers via retrofit.
Disadvantages:
- Installation can be tricky if you mount the camera‑equipped unit.
- Requires strong Wi‑Fi signal in the garage.
Best For: Homeowners who park in an attached garage and want peace of mind.
User Experience: People say the video clarity is good enough to see a car’s license plate. Setup takes 1–2 hours if you replace the whole opener, or 30 minutes for a retrofit. Read also: Best Smart Garage Door Opener with Built In Camera (2026 Guide) – it covers top models and installation steps.
Expert Opinion: If your current opener is more than 10 years old, replace the whole unit for reliability. For newer openers, a retrofit kit is cheaper and easier. Always test the safety reverse mechanism after installation.
Detailed Guide: What to Look for When Choosing Smart Home Devices
Compatibility and Ecosystem
Not every smart bulb works with every hub. Stick with one major ecosystem (Alexa, Google, Apple) to avoid buying items that can’t talk to each other. Check the product page for “Works with …” logos. If you see Zigbee or Z‑Wave, you’ll likely need a compatible hub.
Ease of Setup
Look for devices that boast “no hub required” if you want a simpler start. However, hub‑based systems offer more reliability and local control (no internet needed for basic commands). Read customer reviews specifically about setup time and app bugs.
Pricing and Hidden Costs
The sticker price is only half the story. Some devices require a subscription to unlock full features (e.g., cloud video storage for cameras, advanced automations). Others need a separate hub that costs extra. Budget an additional $50–$100 for cables, adhesives, or outlet repositioning.
Security and Privacy
Smart home devices collect data. Choose brands with strong encryption (WPA2/WPA3) and a clear privacy policy. Enable two‑factor authentication on your accounts. Avoid no‑name brands that stop updating firmware after a year – they become security holes.
Future‑Proofing
Support for the Matter standard is a big plus. Matter is the new universal protocol that promises seamless cross‑platform compatibility. Devices certified for Matter will likely work with all major smart home systems, reducing the chance of obsolescence.
Frequently Asked Questions
Q1: Do I need a hub for my smart home?
Not always. Many smart plugs, bulbs, and cameras connect directly to Wi‑Fi and work with voice assistants without a hub. But if you plan to >10 devices or want Zigbee/Z‑Wave sensors, a hub improves reliability and battery life. Start without a hub, then add one later if needed.
Q2: Will smart home devices work with my old wiring?
Smart bulbs and plugs work with any standard outlet or lamp socket. Smart switches require a neutral wire (usually white) in the wall box. Homes built before the 1980s may lack neutrals in switch boxes. Use a voltage tester to check, or opt for switches that don’t need a neutral (e.g., Lutron Caseta).
Q3: Can I install smart home devices if I rent?
Yes. Choose battery‑powered or plug‑in devices: smart bulbs, plugs, sensors, and locks (that replace only the deadbolt) leave no permanent damage. Adhesive strips work for mounting sensors. Always check your lease – some landlords allow keypad locks if you provide them with a code.
Q4: How do I make sure my Wi‑Fi is strong enough?
Smart devices prefer a stable 2.4 GHz signal, which penetrates walls better than 5 GHz. Place your router centrally. If you have dead zones, use a mesh Wi‑Fi system (e.g., Eero, Google Wifi) or a Wi‑Fi extender near the device. Test signal strength with a free app before buying.
Q5: What is the Matter standard and why should I care?
Matter is a new industry standard that lets smart devices from different brands work together without needing separate hubs for each. Devices with Matter certification are much easier to set up and will remain compatible as your system grows. Look for the Matter logo on boxes if you want the most future‑proof option.
Q6: How often do I need to replace batteries in sensors and locks?
Most smart locks last 3–6 months on four AA batteries. Door/window sensors last 1–2 years on coin cell batteries. The app will warn you when batteries are low. Keep spares handy, and never let them deplete completely – some locks have a backup 9V terminal for emergency power.
Q7: Can I install everything in one day?
Expect 2–4 hours for a basic setup (hub, voice assistant, 2–3 bulbs, and a plug). Adding a smart switch or lock adds 30–60 minutes each. Rushing leads to mistakes – read the manual fully for each device. Spread the installation over a weekend for a stress‑free experience.
Q8: Are there any security risks with smart home devices?
Yes, but manageable. Use strong, unique passwords for each device and your Wi‑Fi network. Disable remote access for devices that don’t need it. Keep firmware updated. Never skip a security update. Reputable brands like Philips, Ecobee, and August have good track records. Avoid cheap no‑name cameras and plugs.
Final Summary: Best Recommendations for Every DIY Smart Home Need
| Category | Product / Approach | Why It Wins |
|---|---|---|
| Best Overall | Philips Hue White & Color Starter Kit | Reliable, huge ecosystem, excellent app, Matter‑ready, and expandable. Perfect for beginners and pros alike. |
| Best Value | Kasa Smart Plug (HS103) + an Amazon Echo Dot | Under $40 for voice control and scheduling. No hub needed. Best bang for the buck to test the waters. |
| Best Premium Option | Lutron Caseta Smart Dimmer Switch + Pico Remote | Rock‑solid reliability, works without neutrals, excellent app, and works with all major assistants. The gold standard for switches. |
| Best Beginner Choice | Wyze Starter Bundle (bulb, plug, sensor) | Ultra‑affordable ($30 for the bundle), easy app, and no hub. Perfect for someone who wants to try multiple device types without a big investment. |
| Best for Advanced Users | Home Assistant (open‑source hub) + a mix of Zigbee/Z‑Wave devices | Full local control, no cloud dependency, unlimited automations. Requires some technical skill but offers ultimate flexibility and privacy. |
Conclusion: Your DIY Smart Home Journey Starts Now
This DIY smart home installation guide for beginners step by step has given you the roadmap, the product picks, and the pitfalls to avoid. Remember: start small, pick one ecosystem, and test each device before buying a dozen. Every smart home begins with a single plug or bulb – from there, you’ll build the connected living space that fits your life.
Don’t let fear of wiring or tech overwhelm stop you. Millions of beginners have successfully installed their own smart homes using exactly these steps. The key is patience, reading manuals, and using the right resources. You now have everything you need to turn your house into a smarter, more convenient home.
Good luck, and enjoy the satisfaction of saying “I did it myself.”
